A little embedded Linux magic comes in unexpectedly handy. Years ago, I started using Acronis True Image to back up my office PC. Other backup packages are available, as they say, but it’s worked well enough for me. This week I had reason to use it in earnest.

The PC is set up with two main partitions on the disk. There’s one for the operating system (Windows 10) and applications, and another with data on it, analogous to the /home partition on a Linux system. Inevitably, it turned out that the boundary between these partitions was in the wrong place. The operating system partition was full, and things were starting to fail. Time to make sure the backup is up-to-date and then to restore to differently-sized partitions.
The operation fell at the first hurdle. Acronis True Image will create a ‘recovery’ USB stick from which the PC boots. This contains a small Linux distribution (Acronis Linux) and a GUI for managing the recovery operation. My backups are on a network drive, which happens to be an Apple Time Capsule. Would the Acronis recovery system connect to the Time Capsule? Would it ever. I couldn’t even persuade it to ask for the username and password, though it could see the Time Capsule on the network.
In Acronis Linux, pressing ctrl-alt-F2 in time-honoured fashion brings up a command line. Yay! Power! A bit of digging reveals a command called asamba which can connect to SMB shares. Using that, I could connect to the Time Capsule absolutely fine and mount it to the local filesystem. So why couldn’t the GUI do it? Annoying.
My next trick was to copy the backup from the Time Capsule to a USB hard drive using another Linux PC. It took a while for the several hundred gigabytes, but it got there. Acronis recovery will read USB drives, so the next step should be easy, right? No. My USB drive happened to be formatted ext4. Though Acronis Linux is perfectly capable of mounting ext4 filesystems, the recovery GUI only acknowledges the presence of FAT and NTFS discs. Aargh!
The solution was to mount the USB drive on my Linux PC, then share it using Samba. Acronis recovery found and let me log on to the Samba share, and could thus see the drive and backups.
Changing the partition sizes was the next problem. The GUI only allows you to shrink partitions or to grow them in to free space. My disk didn’t have any free space. It was all partitioned and in use. I thought that shrinking the data partition would create free space that the operating system partition could grow in to, but I was caught out by the presence of a 500MB ‘recovery’ partition which Windows had sneaked in between the two. I don’t know what it’s for but I didn’t feel like taking the risk of destroying it. There are no tools in the Acronis GUI for deleting partitions and starting again, so I was stuck.

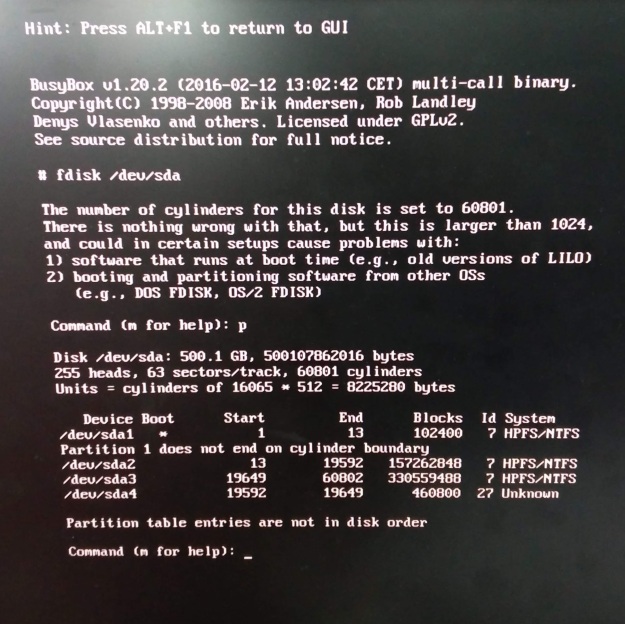
Command line to the rescue! Ctrl-alt-F2 again, and there’s a perfectly good copy of fdisk available. It was a moment’s work to delete the existing recovery and data partitions, then ctrl-alt-F1 to the GUI. Restart the restore process and there’s free space available for the operating system partition to grow in to, and plenty of room to create new recovery and data partitions.

The restore took a few hours, as expected, but was successful. The only wrinkle was that Acronis recovery had marked the recovery partition as active rather than the boot partition, so the PC complained that there was no operating system. Another trip in to fdisk to mark the boot partition active sorted that out, and now I’m typing this very text on the PC restored to working order.
Footnote: there is another Acronis restore tool intended for restoring backups to dissimilar hardware. This may have handled the partition resizing more elegantly, but I didn’t try it.