I’m in the process of fitting dynamo lights to my wife’s bike and to mine. For our rear lights, I chose a light I hadn’t seen before: the Herrmans H-Track. It’s relatively cheap but seems to have good reviews. It meets all the relevant standards, if you care about that sort of thing. A quick test on the bench showed that it was nice and bright, and the illuminated ring round the outside is eye-catching.

The standlight works quite well but stays lit for a long time (around 15 minutes, I’d estimate), gradually dimming until it gives up. That’s not as nice as the B+M DTopLight I have on another bike, which stays lit for the requisite four minutes then switches off. I was curious to see if it was possible to improve it, so I took it apart.
The light is glued together but there are little gaps between the two halves at the bottom, which make it relatively easy to lever apart without damaging it. Here’s what’s inside.

A little PCB with not much visible – three LEDs and a capacitor. It’s nicely made, with a fibreglass PCB, but there’s no waterproofing or other sealing. The rest of the components are surface-mounted on the other side of the board. I noted in passing that neither of the wires is connected to the mounting screws, which is handy for lighting systems like the Solidlights 1203DR which need both wires to the rear light to be isolated from the frame. Here’s a closeup of the PCB.
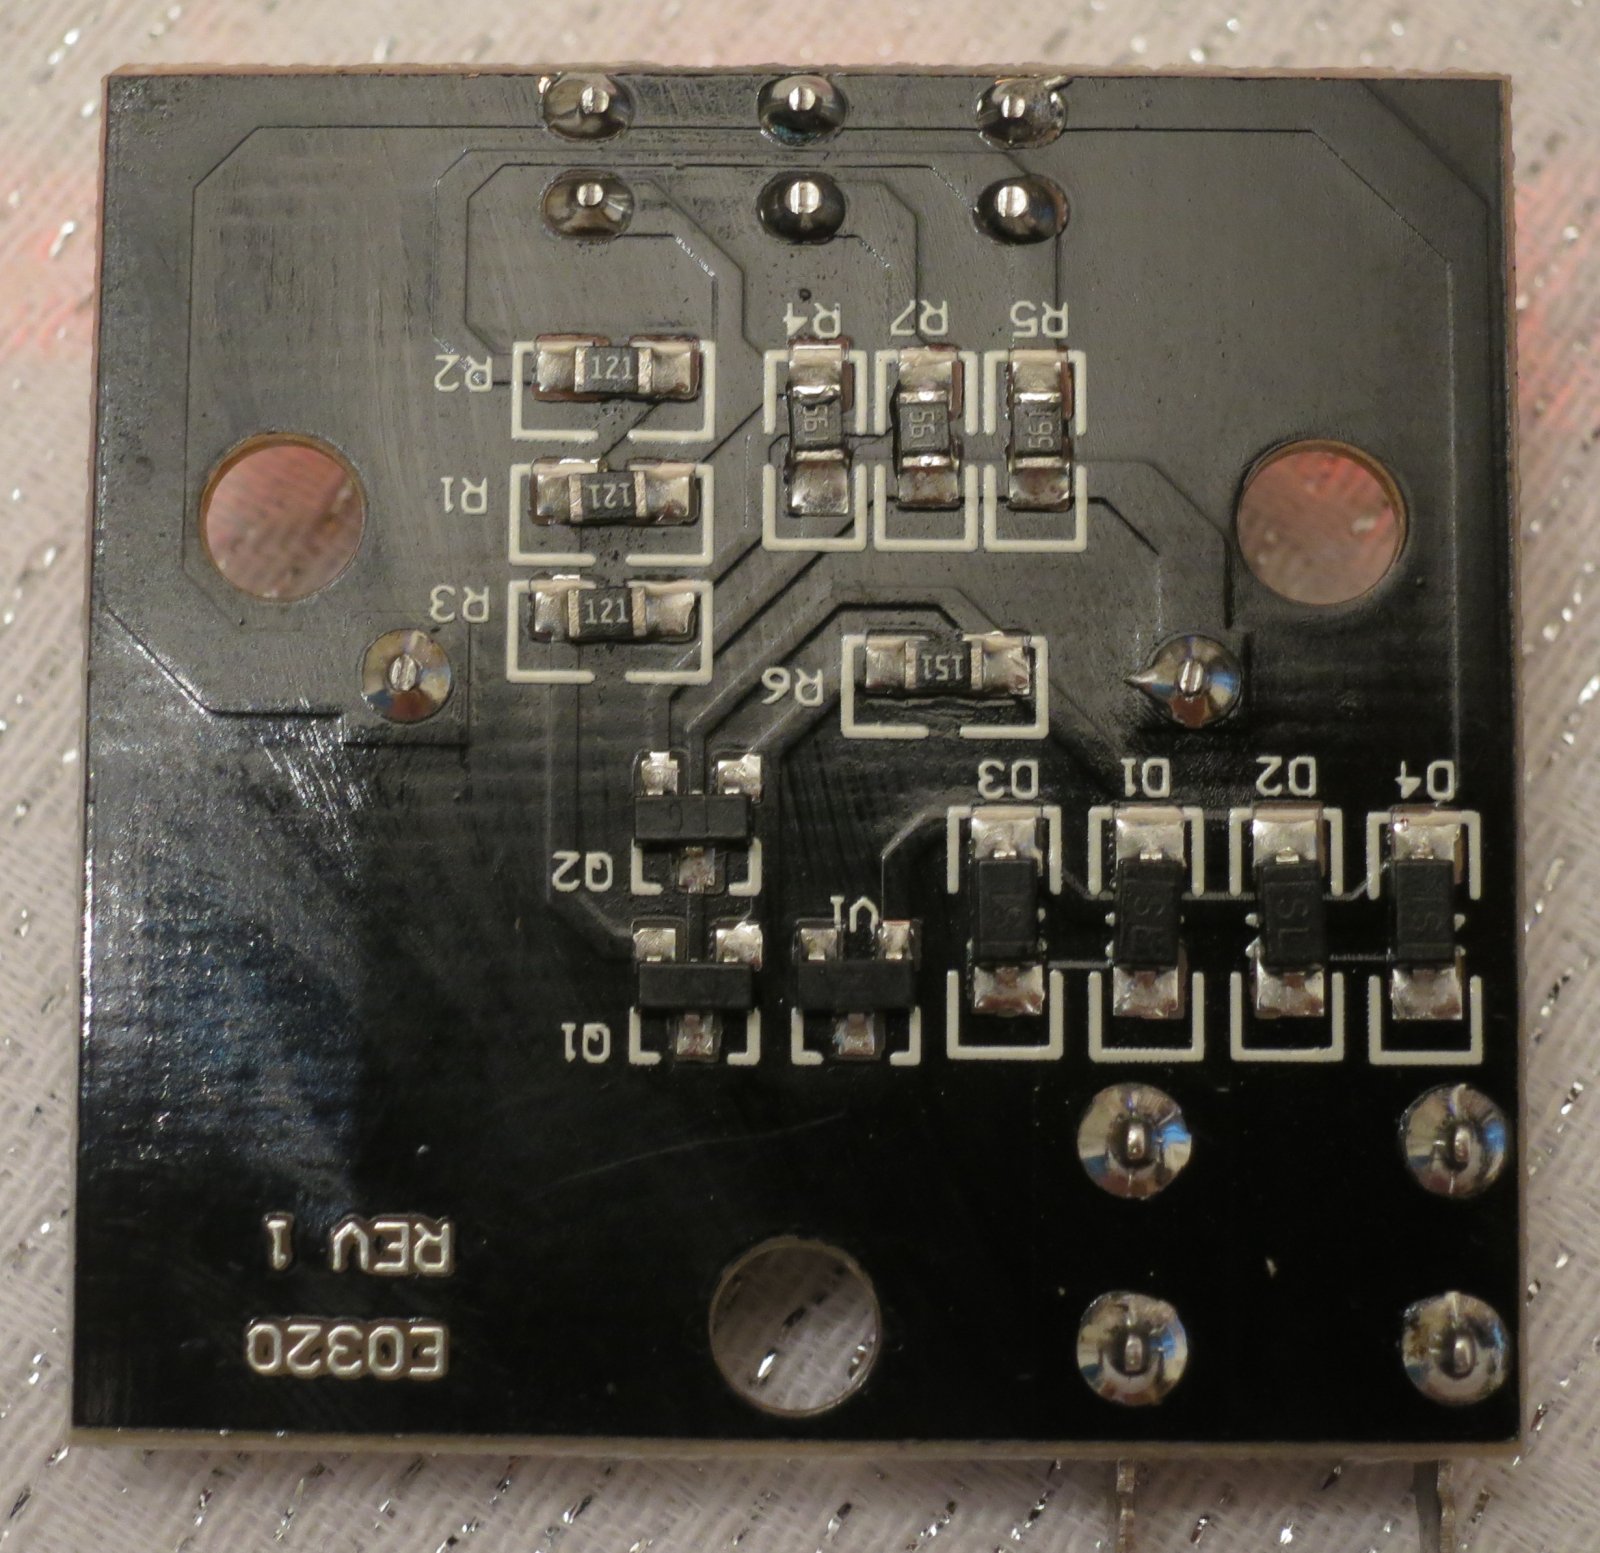
Not a lot to it, really. You get what you pay for. For the curious, here’s the circuit diagram I traced out. It’s clear that the H-Track doesn’t have any protection against overvoltage, so you’re in trouble if your front light comes disconnected.

What about improving the standlight behaviour? Well, I’ve worked out a modification for that but haven’t tried it out in a real light yet. Watch this space.

Pingback: Herrmans H-Track Standlight Modification | martinjonestechnology
Thanks for the teardown. Surely that zener diode provides some over-voltage protection?
Yes, the zener will provide some protection, but I don’t fancy its chances against the full 3W or more output of the dynamo. It will soon overheat and fail, so it can deal with intermittent wiring faults, for example, but not a long-term lack of a front light!
You were right about that zener! Mine fried itself after about 100 hours of use, taking out Q2 and Q1. Luckily I had some inards from a damaged B&M light I retofitted in. The supercapacitor also had high leakage – not sure if that was related. I noticed B&M use a much larger diode.
I’m glad to hear that the description was useful. My rear light runs from a regulated DC supply so I’ve not had any problems with the zener.